Top Social

4/19/2017

Our Perfect Preschool Intro to the Butterfly Life Cycle!

This morning, Beckett learned the simple version of the Butterfly Life Cycle! I was so impressed with how easy and engaging the activity was, I had to share. I started by just going LIVE in my [not so] super secret Usborne literacy group, but we all know those aren't pinnable. So if you're looking for a simple, yet effective process to introduce your preschool through elementary aged kiddo to butterfly life cycles, you've come to the right place!


Step 1: Choose a book you love. I chose Usborne's Butterflies & Caterpillars. In the spirit of full disclosure, I'm an Usborne rep, addict, and hoarder. I love this series of beginner books because they have a great combo of photography, realistic illustrations, and cartoon-like characters. The text is super simple, yet full of great facts and vocabulary. PERFECTION.


Step 2: Pre-read your book. Because our book is aimed for 5+, it would be a lot of information for Beckett (3) to sit down and take in in one sitting. So instead I pre-read the book, and noted the pages that pertained to the life-cycle. [This is one of those ultra secret teacher strategies we use in school]. The book prepared me with sincerely interesting facts, phrased in a way that my little man could understand!

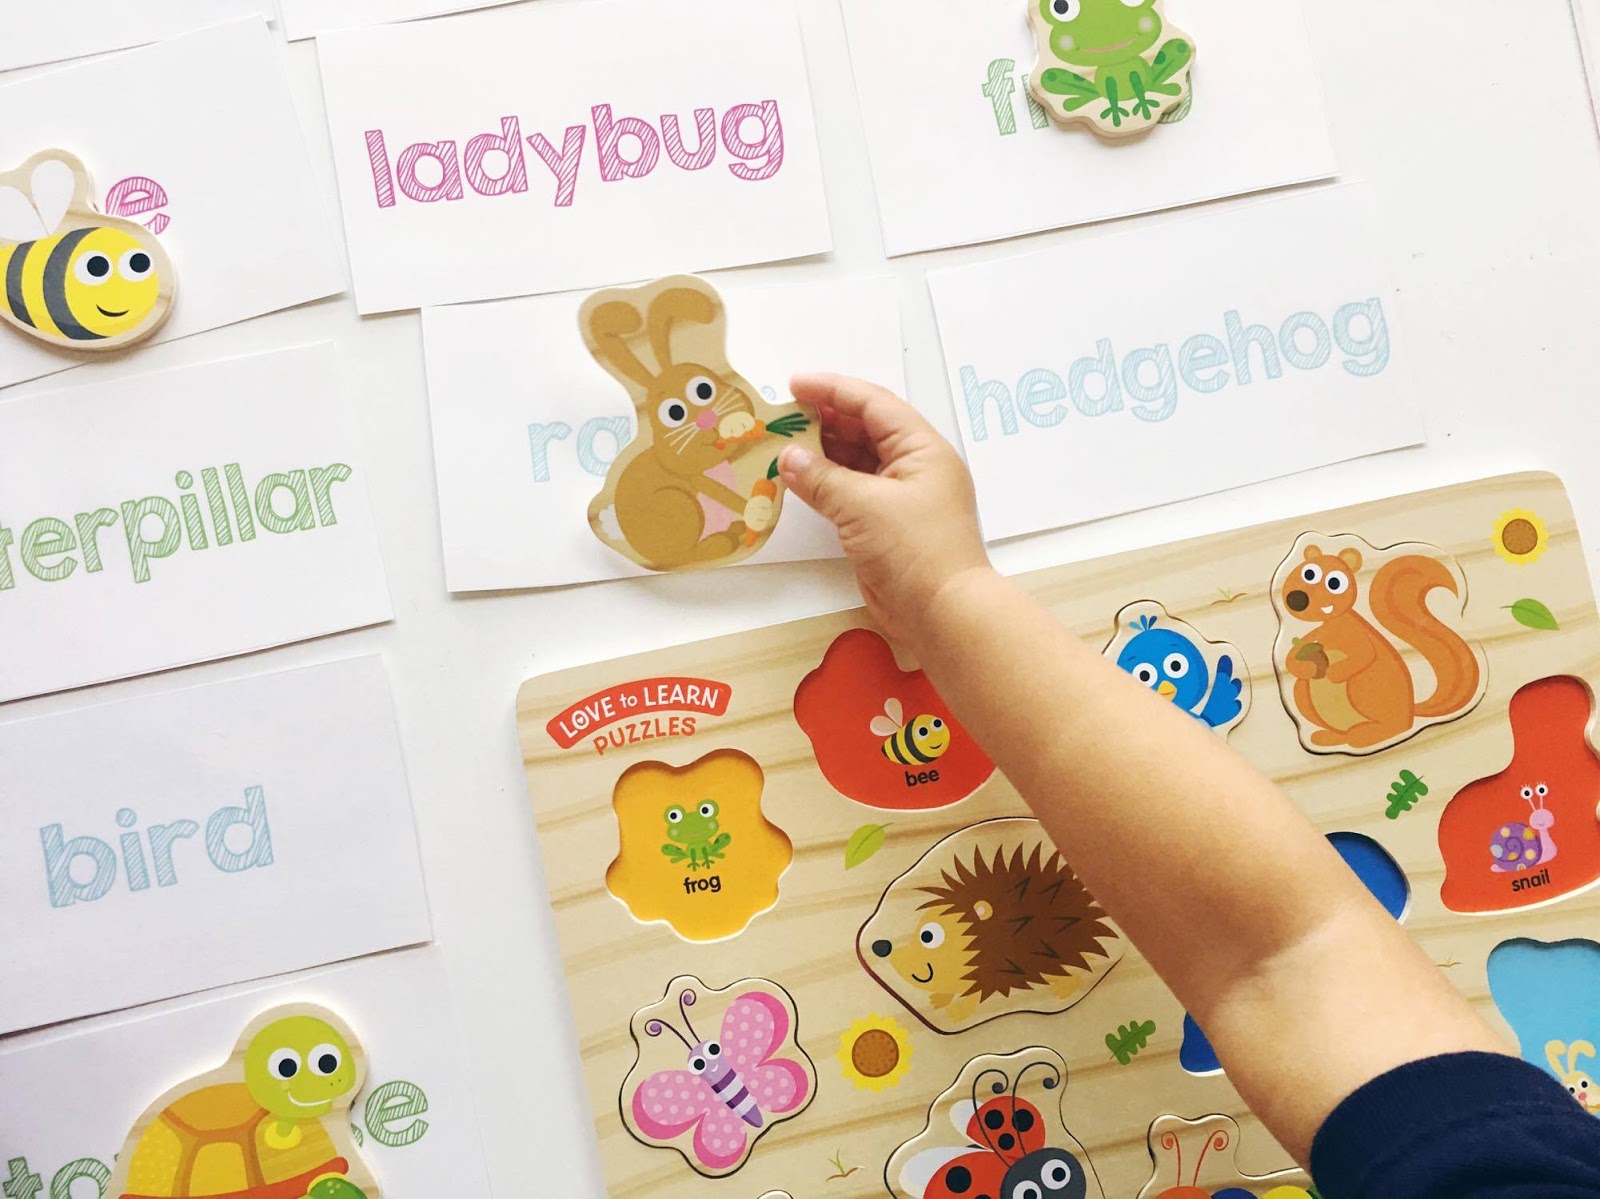
Step 3: Introduce your Flash Cards. So the AMAZING Karen, over at Little Smarticle Particles volunteered to be a guest blogger here just a few weeks ago! She loaded us with some fabulous ideas for teaching life cycles to littles, AND left a super awesome FREEBIE too! You can grab these beautiful flashcards, along with some other helpful tips, right here! Once you've got your cards, talk about them briefly with the kiddos and lay them out on the table.


Step 4: "Read" your book together. While our book is too high to just read straight through, it provides GREAT opportunities for conversation by providing such dynamic photos and illustrations. Beckett and I went though our book together, reading only a couple of the sentences, but using the illustrations to talk about each step of the cycle. This is also where I add a LOT of "oohs" and "aaahs" and "isn't that neat?" and "what do you think happens next?" He ATE. IT. UP.

Step 5: Assemble your cards in their cycle AS YOU READ. After each page, we looked for the life cycle card that represented our page and assembled it into the circle cycle diagram! And voila!


In addition to learning about life cycles, this activity is great because the simple steps of talking about the text, then finding a card to represent it, engages your child and allows them the opportunity to show comprehension. Try to let them use the cards to re-tell the cycle. This is a great skill to practice!

By the end of the morning, Beckett was assembling the cards on his own & talking to himself about the cycle. I can't get over how much he adores this sort of thing!

What do you think? Can you totally see your littles getting into the Butterfly Life Cycle? Let me know how it goes! We're sharing this and other fabulous ideas over in our [not so] super secret literacy group. We'd love to hear from you! Join our BOOK conversation here!

Don't forget to pin it!


4/18/2017

What Makes It Rain Experiment!

Imagine the most darling three year old Beckett voice, in the most perfect staccato, asking: "Mom? Why. is. it. waaayyniin??"

Swoooon!!

How can you pass up answering THAT sweet question in the most thorough, engaging manner you can possibly dream up?! I couldn't. So we threw our Garden Week activities to the wind and dove into our Usborne What Makes It Rain? book. We examined just the first page of the book, which has fun questions about rain (whereas the other pages are on the sun, snow, etc) and we talked about how the clouds get heavy with water until they juuuust caaan't hold it anymooore! AAAHH! And it faaallss!! Hehe. Can you just imagine the fun?


I've seen this activity floating around the Insta-sphere for a while now and I just couldn't wait to have our turn to do it. We didn't even bother to look up instructions because it seemed pretty self explanatory. ;)


First, we gathered our materials and lined our table with wax paper. I wanted easy clean up but didn't want to clutter our pretty white space with a bright table cloth because I thought it might take away from our experiment. Because we only had gel food coloring, we used a small jar to mix it with water and shake shake shake! Of course, this was super fun for Ms. Chuck.


We took a minute to talk about clouds and where we find them. Then we talked again about how water fills them and guessed what would happen next! Notice in the photo that our shaving cream is SUPER FLUFFY. We actually ended up dumping that first jar and going for round two. Keep in mind that good stuff GROWS!


Beckett had so much fun squeezing rain drops into our cloud, I can totally see us doing this activity every rainy day for a long time! As a bonus, it served as a great fine motor skill. ;) I've seen this done with eye droppers but since we didn't have one of those on hand, medicine syringe it was!


What do you think? Can you totally see your littles going gaga over this activity? Let me know how it goes! We're sharing this and other fab ideas over in our [not so] super secret literacy group. We'd love to hear from you! Join our BOOK conversation here!

Don't forget to pin it!


4/16/2017

Egg Carton Flower Garland

So this year I started creating shelf-scapes, as I like to call them. I change out the theme, books, and decor of my book shelf about once a month. This month, however, we doubled up and did Easter for the first half of the month and switched to GARDENS for the second!


So I've just recently discovered Cara Raising Kinley. If you haven't found her on IG yet, do yourself a favor and follow her over here. She's chock full of beautiful ideas, including this brilliant concept for flower garland! You can find Cara's full tutorial right here, which we followed with a few minor adjustments to fit our style.

Let me warn you. I had high hopes for this project but my almost 2 and 3.5 year old did not make it very far into this project. Painting all of the edges of these intricate cartons take some serious commitment to the cause. So unless you're in this for your own enjoyment, I suggest doing this with kiddos with longer attention spans.

Cara cut her cartons first, but I thought it would be easier for little hands to paint the cartons whole. We also chose acrylics over watercolor because it's our paint of choice! [The kids also paint naked in this house, because acrylics are NOT WASHABLE, so be warned]. Paint the outside, let dry, then paint the inside!


Once those were completely dry, we showed Beckett how to punch holes into the cartons. While he wasn't super interested in the painting part of the day, he took this job VERY SERIOUSLY. Hint: put a cutting board under your cartons!


Finally, I cut apart the cartons, sliced triangles in the sides that needed them, and popped them onto this cool string of green lights I had from our March shelf-scape! I did two flowers on lights and then skipped a bulb to stretch out my flowers and because I thought it looked better. Then I just plugged those bad boys in and VOILA! Prettiest flower garland I've ever made! ;)


What do you think? Do you think you'll try your own flower garland? What will you use it for? We're just starting off GARDEN WEEK over in our [not so] super secret literacy group. We'd love to hear from you! Join our BOOK conversation here!

Don't forget to pin it!


4/11/2017

Same Old Puzzles, Brand New Fun

I've been on this kick for simplicity. Mostly I'm just all over the place when it comes to parenting/teaching/wifing/blogging/life in general so sometimes I'm way over the top and then sometimes I'm reminded that if I feel like I'm losing my mind, I'm allowed to make a change. [Can I get an amen?!]

So we're gearing up for spring by diving into all things GARDEN and I happened to find this beautiful puzzle in the clearance section at TJMaxx yesterday. Can we say MEANT TO BE?! There are exactly ONE MILLION THINGS you can do with a fun puzzle like this. Did you know that?! I won't list all one million for you, but I'll start you off with the three we did today:


1. Hide and Seek
First, I hid the pieces of the puzzle around our little library room. The kids got SUCH a kick out of this. Of course you will know how difficult to make your hiding spots but mine were pretty much in plain view and my kids still needed help. Beckett asked to do this three times and I'm pretty sure puzzles will forever require a search and rescue step first.


2. Word Match
I'm a big fan of flash cards. I know there's a whole movement out there where flash cards are the epitome of lame but WHATEVER MAN. It's my party and I'll flash card if I want to.

So I whipped up these bad boys, because I'm ALSO a big fan of computer creating + lamination. However, this would work JUST as well if you wrote these words neatly on index cards. And your kids could not care less.


Once Buck & Chuck found all of the pieces and put the puzzle together, Beckett chose animals from the puzzle, one at time, and matched them to an index card. He used the puzzle itself to help clue him in when he didn't know the word. You may not know this, but this is a FABULOUS skill for kiddos to practice! We want them using their resources (in this case, his puzzle) to answer questions and solve problems. Once all of the puzzle pieces were matched with their flash cards, Buck & Chuck worked together to reassemble the puzzle.

3. Word Recognition
Finally, I challenged Beckett to read the flash cards, using the photos as a sort of answer key. He thought this was totally boring and we didn't make it all the way through, but I still stand by the concept: I placed the assembled puzzle on the floor for him to reference while he read through the cards. After your kiddo has done the word matching enough times, they will start associating the puzzle pieces with the words, and hopefully be able to read them! Imagery is a POWERFUL learning tool, so pairing mental images like this is a great way to learn to recognize new words!


That's it! Super simple, low-prep, no mess fun! What do you think? Do you have puzzles like this at home that you can turn into a new adventure? We'd love to hear from you! Join our BOOK conversation here!


4/06/2017

3 Easy Preschool and Kindergarten Easter Ideas

Hi, I'm Jenny from Jenny's Crayons and so excited to guest blog on Denise's blog today.  I teach preschool for my son and his friends.  I love to share the ideas I come up with for preschool on my blog, and Instagram.  I also like to post all my fun Target finds on my Instagram, atargetmom.  Here are some fun Easter preschool ideas.


1. This is one of my daughters favorite activities and she came up with it.  We got a necklace making kit at Target.  We made the necklace, but for some reason did not finish it.  My daughter decided she wanted to go for a treasure hunt with the felt flowers.  We probably did it at least 10 times the day she discovered it.  We take turns placing the flowers and looking for them.  This idea could be used for preschool, for Easter morning hiding gifts, or just for fun like we did.


2. The next activity I came up with was using using scrabble letters and some eggs and a bag we got from the dollar spot at Target. Can you tell we like Target? Everyone pulls a letter out of the bag and comes up with an Easter word that starts with that letter.
3. The last activity I came up with was one involving numbers and eggs all the supplies also purchased at Target.  I bought the felt letters for each of the kids.  The teacher puts down some eggs.  The kids have to choose from their pile how many eggs there are and put the corresponding number down.
Thanks for letting me share my Easter preschool ideas with you.  What are some fun ideas you have come up with?
4/04/2017

Four Sneaky "That's Not My" Literacy Skills

Ok, we've had these "That's Not My" books in our house for several days now and let me just tell you: if I weren't swooning so much over how much my kids love them, I would probably be ready to hide them. I have heard the phrase "That's Not My" about one bajillion times in the last 48 hours. I might actually end up dreaming of bumpy lamb hooves and dinosaur teeth.

But I not-so-secretly love it.

I've seen endless touchy feely books over the years, but the Usborne "That's Not My" Series is hands down the best quality I've ever encountered. The textures are deep, exaggerated, and creative. I bought them thinking Chuck would love them, but what I didn't expect was to have so many learning opportunities for Beckett, my preschooler! We officially have the very first books he can "read" on his own!


We've had such an incredible time exploring and learning with these book that I decided to share with you the four SNEAKY ways we're learning with Usborne's That's Not My Lamb and That's Not My Dinosaur. Your kids will love these bad boys so much, they won't even know they're hitting super important reading (and writing) skills!

1. Tracking
Because ALL of the books in the That's Not My series follow the same pattern, there's a REALLY good chance your kiddos will memorize them! This is great for a number of reasons, but Beckett and I have been working on tracking words. This means that he follows the words with his finger as he reads. You can also use a fun tool like a magic wand for this purpose. Tracking is a super important early learning skill. It helps them learn that words move from left to right on the page, and helps them understand that each word on the page matches a word that comes out of their mouth.


2. Sight Word Practice
Again, because the books are repetitive, they provide a great opportunity to start identifying words. After reading the books several times, and then tracking the words as you read a page, try one of these questions:
  • Do you see the word, "my?"
  • Can you read this word? [pointing to a familiar word]
  • What words do you recognize on this page?
3. Using Picture Cues
A strong reader uses context clues to determine words they don't know. As we get older and become more capable readers, we use the context of the paragraph or story to determine the meaning words we don't recognize.  Young readers use illustrations to do the same thing! Teaching kids to use picture clues empowers them to be independent readers! The "That's Not My" books are a perfect opportunity to practice this skill because only a few words change on each page. Each time a word changes, there's a clear illustration to guide the reader!


4. Using Descriptive Words [Adjectives]
This was the MOST fun activity we did with this book, and it was SO SIMPLE! After reading the book several times, I went through and asked questions about the pages.
  • How does his hoof feel?
  • Do his ears feel rough or soft?
  • Can you find something bumpy?
Then I challenged Beckett to describe things around the house with our new adjectives! We rubbed the carpet and he determined it was "wooly." We touched a fire log and determined it was "rough." We ran our fingers over the air vent and labeled it "bumpy." So simple and SUCH a great vocabulary builder! I was expecting to have to guide Beckett quite a bit on this activity but he actually was able to choose an appropriate descriptive word for every object in the house I found. Then we switched it around and HE got to find the items and challenge ME! 


And that's it! A book that I initially thought would be appropriate only for babies has turned into an excellent learning tool for my preschooler as well. Usborne currently has 36 different titles in this series and is rumored to have more than a dozen new ones coming! Check out the whole collection here.

What do you think? We'd love to hear from you! Join our BOOK conversation here!


4/02/2017

Noah's Ark Process Art Collage

In this house, March was for all things Saint Patrick's Day, Rainbows, and Noah's Ark! Logical succession, right?! We thought so, and we had a total blast with it! We spent the month talking about Real vs. Pretend, playing with colors A LOT, and of course discussing the story behind [what I assume is] the first rainbow. We ended our month the most beautiful process art collage I've ever laid my eyes on!


This process was not a super short one, but it wasn't complicated either! As long as you're willing to give it a few days, you're going to ROCK this project! Here's what we did:

First we started off by reading about Noah, and discussing the fact that it's a REAL story. We followed it up with PRETENDING using these beautiful animal action cards. If you need a good workout in your day, I recommend stomping like an elephant, pouncing like a cheetah, and hopping like a kangaroo around your house a couple times! The kids got a TOTAL kick out of this and it burned a good amount of energy before we sat down for some art!


Once we were all worn out, we sat down with some animal cards + paints that I had strategically chosen. We discussed one card at a time, and which colors we saw. Then we chose the paints that corresponded! To do this scraping activity, you simply dot a few colors of paint over your paper, then use an old gift/rewards/credit card to scrape it around!! I thought Beckett (3) would be great at this and that Charlie (19 months) would be a mess but it was totally the other way around! Since Chuck's little hands can't squeeze too hard, she ended up with perfect little dots, while Beckett DROWNED his paper and life-guard mommy had to come in for the rescue [every. stinkin. time].


To make the Ark, we used this same process with brown, black, and deep red on a brown paper bag. By the time we finished papers for five animals + an ark, we were DONE for the day! A full week later, we came back to finish the process.

For the animal's faces, I simply traced outlines I found online and cut them out of our painted papers. Beckett helped a little bit, but his fine motor skills are not ready for this work! So while I worked on the animals, Buck & Chuck worked on the water! I handed them blue felt, construction paper, and tissue paper, showed them how to cut strips and glue them on, and then set them loose [sitting very close by and guiding the process, obviously]. They actually did a FABULOUS job on this and I was so excited!


Once we were done cutting our animals and creating our beautiful blue background, it was time to assemble! Beckett helped me place the animals by telling me which one could be in the water and which had to be on the boat. Then he and I worked together to hot glue everything down and get those adorable wiggly eyes in place!


And that's it! This project could totally be fun with an range of ages, and can be applied to so many different themes! We will DEFINITELY do this scrape painting again. Process art for the win!

Don't forget to pin it!


www.BuckAndChuck.com
www.Instagram.com/Buck.And.Chuck
www.Facebook.com/groups/BuckAndChuck
3/30/2017

Life Cycles and Young Children

Happy Spring, y'all! I'm Karen from Little Smarticle Particles, and I'm thrilled that Denise is letting me share some fun ideas for teaching and learning about life cycles with your little ones.

First of all... do you think you are not a "science person"? No problem. Children are naturally curious about the world around them, so science concepts are a natural fit (especially when it comes to critters).

Secondly...(I have to get on my soapbox for a moment), as a veteran teacher and a mother of grown children, I have to tell you that the most important thing that you can do for your children is to talk to them. Have conversations. Listen to them. Stop and show them stuff and explain how it works. You don't have to be technical. It is my firm belief that when parents talk to their children and read to them (daily!), they are setting them up for academic success.

But I know you already do this. How do I know, you ask? Because you are already a step ahead of the game by visiting Buck & Chuck!

So... let's get this party started. I have found that one of the best ways to get things rolling is with a good read aloud. I happen to love just about any book by Gail Gibbons. She is my go-to author for all things non-fiction. She is also the illustrator, and she labels her illustrations... (yay! as a science teacher, I'm all about the labeling).

Affiliate Links:
Let me backtrack for a moment. When my children were small I read to the regularly. I love to read, and I wanted to them to love to read as well. But, what I noticed was that each of my two children were very different. My daughter could sit in my lap all day and be read to, while my son would only sit still for so long. Sound familiar? 

So here's the secret: adapt to them. If they can sit for a while, read the text word for word. Track the text with your finger and take time to discuss the pictures. If you have a little one that doesn't sit still for long then summarize. Hit the highlights. Look at the pictures and describe what is on the page. Ask them questions and let them ask you questions. If you don't get the entire book read, no worries. Read it in chunks. A little here, a little there.

Another fun idea for teaching young children is with play. I saw these fun toys at a workshop and knew I had to have them. Luckily I won a door prize and got to pick what I wanted. Yay!!


When you talk about these toys, be sure to use the words hatchling, chick, chicken, and hen. It won't be long until you notice that when they play with them, they will also be using the proper vocabulary. You can always ask questions that lead your kiddo to sequence the the figurines with the words first, next, last, finally, etc... Your kiddo will be learning valuable skills that go way beyond just knowing about life cycles! These life cycle toys are from Safariology. They also have sets available for butterflies, ladybugs, frogs, plants, and quite a few more. 

While I love my Safariology toys, at $9.99 a set, they can get a bit pricey. So...how about a freebie?
I've created a set of sequencing life cycle cards for chickens, frogs, and butterflies. Each card also has an arrow that can be cut out. Use these arrows to arrange the cards in sequential order and reinforce the concept that a cycle happens over and over. Just copy them on cardstock, cut, and your ready to go!


 I hope you enjoyed my post... have fun learning and exploring with your little one!

Karen